Showing posts with label earring. Show all posts

Monday, September 3, 2012

Crochet Earring Khloe


Crochet Earring Khloe

Written by Teresa Richardson

Video Tutorial:  Crochet Earring Khloe


Video Tutorial:  Crochet Earring Khloe Left Hand Version


Skill Level - Easy

Abbreviations

DC - Double Crochet
HDC - Half Double Crochet
CH - Chain
SL ST - Slip Stitch


Materials
Size 1 steel crochet hook
3 crochet cotton
Tapestry Needle

Earring Findings
Jump rings
Needle Nose Pliers

Extended Single Crochet - This is a single crochet worked loosely around previous rounds.  You put your hook below the chain 3 loop on round .


Work a chain 10, join. 
Round 1:  Work a chain 1, this is the step up and will not count as a stitch. *3DC, CH 2, 3DC through the chain 10, Chain 3, work a total of 6 times from *. Slip stitch across DC to the next chain 2 space.

Round 2:  Work a chain 1, this is the step up and will not count as a stitch. *3DC, CH 2, 3DC, work a chain 5, Chain 3, work a total of 6 times from *. Slip stitch across DC to the next chain 2 space.


Round 3:  Work a chain 1, this is the step up and will not count as a stitch. *3DC, CH 2, 3DC, work a chain 7, work an extended single crochet around the chain 5 and chain 3.

NOTE:  You will twist the jump rings sideways, insert the crochet earring and twist sideways to close back up.


If you are a beginner, you can find a playlist for the basic crochet stitches by clicking on this link.  Beginner Crochet Stitches

Crochet Geek YouTube - http://www.youtube.com/tjw1963

Crochet Geek 2 YouTube - http://www.youtube.com/user/crochet


Sunday, September 18, 2011

Unique gift for women: Paperclip Earings tutorial


Paperclip Earings

So here's what you need:
2 paperclips
earrings
floss
glue - use liquid stitch or tacky glue


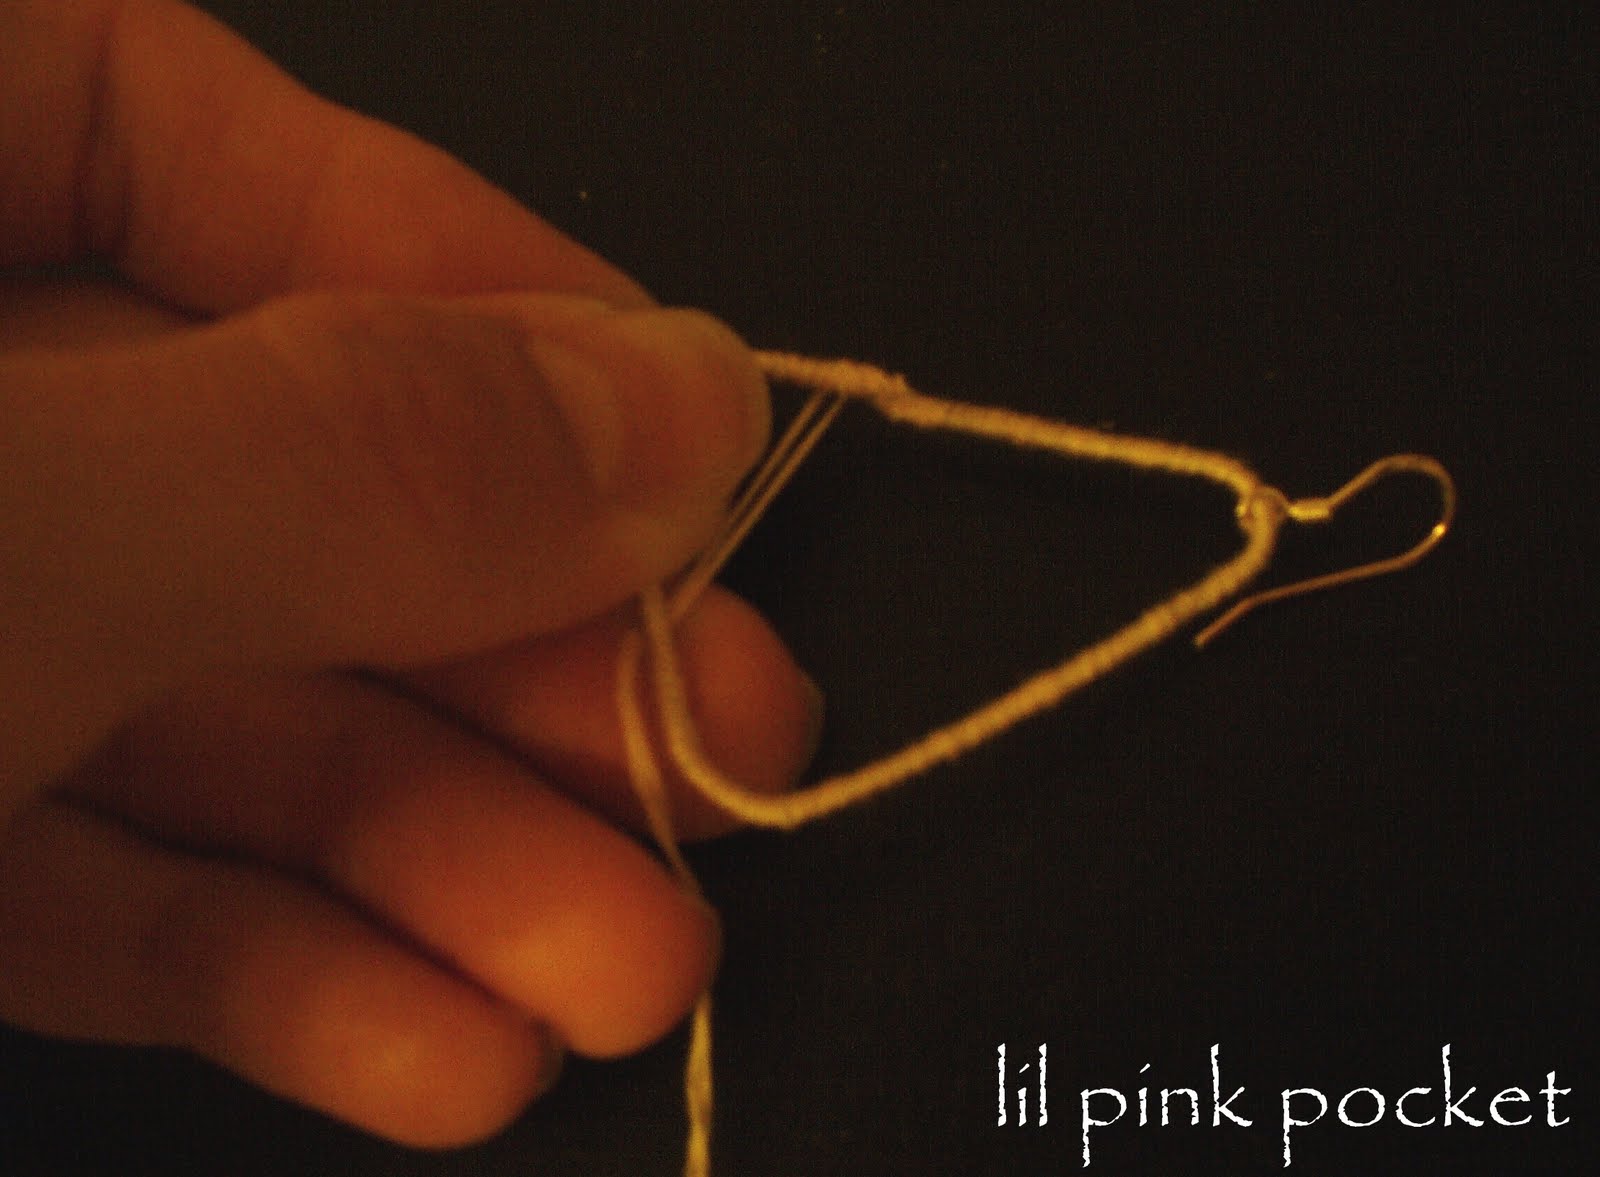
Open all 3 sides of paperclips forming a triangle. Slide earring part onto paperclip.

Glue together ends of paperclip and begin wrapping floss around the
entire paperclip adding a dab of glue every so often.

Once you've covered the entire paperclip begin making the web like earring by wrapping in all different directions. On my next pair I would make sure to wrap long way in the beginning of wrapping. To finish it off I put a dab of glue at the top and wrapped the end around it multiple times.


This was so simple and took very little time to do. I love how they turned out and I'm so excited to wear them! I love earrings and these are so light weight you don't even notice they're there! I have plans to make more so I'll share those when I get them done! Enjoy!

Tuesday, August 30, 2011

Crafty jewelry: Make Easy Two-Bead Earrings

Crafty jewelry: Make Easy Two-Bead Earrings
 Jewelry making
For the basic version, you'll need:
  • Two pairs of beads: one large, one small

  • Two eyepins, 2 inches long, around 21 gauge (.028 inch)

  • One pair of earwire hooks with open loops

  • Round-nose pliers


 Use special beads that stand out for the larger ones, and simple beads in a coordinating color for the smaller ones.
Start by slipping a large bead onto an eyepin, grab the eyepin more than halfway up (about two-thirds of the way is good), and bend it to a sharp angle.


 Try to hold the eyepin close to the end of the round-nose pliers when bending.
Now slip a small bead on the eyepin and grab the tip of the eyepin with the end of the pliers.


 You're going to bend a loop in the end of the eyepin to match the other end.
This is the way I bend the eye; although I don't think it's the "right" way, it's the best way for me. So do this part whichever way is best for you. Bend the end around in a loop.


 Bend it all the way around until it's touching.
Next, grab the base of the loop and bend it out at a slight angle.


 Bend the loop base the same way it's bent out on the eye of the eyepin.
That will open the loop a bit, so just use the pliers to bend the loop end back in and make it look good.


 Now you have two matching loops on the ends of your eyepin.
To put your beaded eyepin onto the earwire, open up the loop just enough for the eyepin wire to fit.


 This loop will probably be much harder to bend than the eyepin wire.
Slip the eyepin into the earwire loop at the curve.


 When making your second earring, be sure to slip it on the opposite way for symmetrical earrings.
That's it! Repeat all steps for the second earring—I usually do each step for both at the same time so they match best.


 These are so simple, a great design for everyday casual wear.
Version 2

Variation with multiple beads instead of one large bead: You'll need as many beads as you want to use on the larger side, and one pair of beads for the smaller side.

Variation with headpins: You'll need two headpins around 21 gauge instead of the two eyepins.


 This version will make use of more beads.
You'll need to make sure you choose a smaller bead with a hole small enough to stay on the headpin—so a hole smaller than the head. To make each earring, first slip on the smaller bead, then bend less than halfway up, slip on the multiple beads, and bend a loop.


 I chose a fairly large bead to be my smaller-side bead, but this design would work well with a small seed bead, too.
Finish off the same way as the basic version.


 Be sure your bead colors all coordinate well to avoid overly busy earrings.
And here is another similar version but all flipped around. The head end of the headpin is on the larger bead side, which is only one bead, and there are two small beads, with the loop on that end.


 Two small identical beads add a little more interest but don't draw attention away from the larger bead too much.
Version 3

Variation with more crafty earwires: You'll need earwires with long shanks instead of loops and another pair of pliers; flat-nose is best.

Variation with asymmetrical beads on the large sides: You'll need two similar but different large beads, or one large and two smaller that add up to about the size of the large one.


 I chose very simple small beads to keep the earrings from being too complex or busy looking.
Since you are making your own loops for the earwires, you can make them however you want. I made this pair with basic loops but a longish length of wire above the loop. Grab the wire where you want the loop to start and bend the wire to a 90-degree angle. Then bend the end up around the nose of the pliers, all the way around the nose until the loop is completed.


 Place the pliers on the wire depending on how big you want your loop—closer to the end of the nose will make a smaller loop, while farther back will make a larger loop.
Now hold the loop with the pliers and use your second pair of pliers to wrap the wire end around the earwire.


 You can choose to cut the wire when it's wrapped as much as you want.
Squeeze the tip of the wire down so it doesn't stick out. Place a large bead onto an eyepin, bend the eyepin, and put the other end through the earwire loop.


 Your new earwire loop won't open, so you'll have to make the earring in a different order than the other versions.
Place a small bead on the eyepin and make a loop in the end to finish off your earring.


 The three larger beads being the same color helps tie together the earrings even though they are asymmetrical.
Here's another pair with the same variations—these have only one large bead on each earring but they are different yet similar enough to work. These earwire loops were made much higher up, giving more wire to twist around for an interesting earwire look.


 The different shaped beads share the same colors and are about the same size, helping them work together as a pair.
Of course, I encourage you to come up with your own variations—be creative!


 This project is so quick, you could gift a set of multiple pairs if you hurry!


Source: craftstylish.com

Crafty jewelry: Recycled Sweater Wool Jewelry!

allearrings1  
Crafty jewelry: Recycled Sweater Wool Jewelry!
Jewelry making
It’s a simple concept: cut a shape or two or more from a felted wool sweater, attach the pieces to jewelry parts – that’s it!  Well, that’s not really it though, you can make it so much more!
A little background – the yellow hoops were the first thing I made with this idea; when I made my embellished cardigan, I had some yellow ovals left over from the pockets, and I thought, hmm, I could make those into something… I cut the centers out, stuck on some earring wires, and that was that!  Rad!  I played around with the idea a bit further then, making those blue teardrops below, adding some embroidery this time:

yellowhoopearrings blueearrings
Well then I thought, this seems like such a perfect class project – not too many materials or tools needed, super simple concept, but with infinite creative possibility!  I bet students could do all kinds of creative things with the concept, I thought… Well, hoo-boy was I right!  Check it out, these are what four crafters did in my most recent class:
studentsearringsandjack studentsletters
studentsnecklace studentsearrings
I hope they don’t mind me sharing their awesome creations.  I didn’t take photos in any of the previous classes, which I now regret – every single class has had amazing pieces!  Don’t you love that pendant on the bottom?!  I do!  It was made by the library helper at the Sellwood branch, who clearly has fabulous color sense and design talent!
yellow bracelet yellow earrings
I made these pieces as more class examples – a matching set of earrings, fastened together with jumprings, and a bracelet, the pieces stitched together with embroidery floss, to show different ways of joining parts.
yellowset
So for this project, you’ll need:
  • Recycled wool sweater pieces, felted (great for using leftover scraps after making bigger projects from felted sweaters)

  • Scissors

  • Jewelry findings of your choice (depending on what kind of jewelry you’re making)

  • Jewelry pliers

  • Embroidery floss and/or thread (optional, depending on your design) and needle

  • Optional cheap felt and pins for using templates

And the “tutorial” from my class handout…
This project is very free form, not requiring a step-by-step how-to, but the basic steps are:
Cut shapes from felted wool.
Use felt shapes to make jewelry, by either
-stitching pieces together with thread/embroidery floss/yarn
-or joining pieces together with jump rings.
Attach clasps, earring wires, or other finishing parts.
Add embroidery decoration or other optional embellishments.
When stitching parts together, if you want the piece to be able to stretch, use zig zags or diagonal stitches.
Use jewelry pliers to work with jumprings, clasps, and other parts to close them tightly.
Cut any shapes you want, either freehand or using a template (paper or felt).  If you want 2 identical parts, cut 1 first, then pin that one to the second piece to cut it the same.
Of course, I’m there for individual help in the classes, with using pliers, sewing, etc, so I’ve linked to a few how-to sites to help you along with any parts you’re not familiar with.  You can also usemy earring making tutorial on Craftstylish for help with jewelry-making steps.  If you want a book to help, I definitely recommend Susan Beal’s Bead Simple – she’s the one who taught me how to make earrings!
templates
These are craft felt templates I cut for students to use if they want.  If you’re not sure what shape(s) you want, or you want multiple identical shapes, it’s a good idea to play around with some cheap craft felt before cutting into your sweater.  You can try different shapes until you get it just right, then pin the shape onto your sweater and cut around it.
As for felting, this is also on my class handout (see Diane’s felting post on Craftstylish for my detail):
To make recycled wool felt at home, choose a sweater made of 100% wool, or with other animal fibers (like alpaca, angora, cashmere).  Machine wash and dry the sweater on hot or warm settings; this will shrink and “full” the sweater, turning it into felt.  If you want it thicker/denser, wash and dry it again to felt it more.
redearrings4
These are earrings I made during a couple of classes, and probably my favorite ones I’ve made.  Still not nearly as creative or elaborate as some of the students’ creations, but I like the simplicity of them, since they’re pretty big and bright.  (I tried to photograph myself wearing them straight on, so you could see both earrings in the same shot, and this is the best I could get, hah!)
redearrings2 redearrings1
And here are all of my earrings… Obviously, I like making earrings more than other kinds of jewelry, probably because I rarely wear jewelry besides earrings andcuffs.  I had plans to embroider on those dark grey rings, but I think I’m going to leave them alone; again, I like the simplicity…
allearrings1  
Source: leethal.net

Sunday, August 28, 2011

Crafty jewelry: Make Beaded Hoop Earrings


the perfect pair of dress-up earrings to wear 
 Crafty jewelry: Make Beaded Hoop Earrings
Jewelry making
 

The supply list for these is pretty simple and this is a great project for beginning jewelry makers.
  1. Pearls – I used three colors that were three different sizes (Michael’s)

  2. Findings – Headpins and Wire Loops (Hobby Lobby)

  3. Round Nose Pliers – (Hobby Lobby)

  4. Wire cutters


Thread one bead onto a headpin and cut the wire down to about half an inch above the top of the pearl. Using Round Nose Pliers, grip the headpin close to the very top of the cut wire. You want to be able to rub your finger on top of the pliers and not feel the wire sticking out. Gripping the headpin, turn the pliers, making a loop. Keep looping until the cut end of the wire touches the wire near the pearl. At this point, your loop will be in a “p” shape. Again using the round nose pliers, grip the wire close to the bead, like the bottom right picture above.

Turn the loop so it is no longer a “p” shape but a nice circle-shaped loop.

Continue making pearl loops until you have your desired amount of beaded loops for both earrings. I like to line my beads up to make sure I have made the same amount for each earring and also to make sure I put them in the same order.

Slide beads onto wire hoops, and you are done!

Now put on your pretty new dress-up earrings and show them off! See, I told you it was easy!
Source: craftsnob.com

Labels

1 column 2 column 3 column 4 column aaSolah Accessories add button subscrise for blogger Add Digg Button to Blogger add feedburner for blogger add like button facebook to blogger Add Pinterest Pin it Button to Blogger add sitemap blogger to google add stumbleUpon badge to blogger Ads Ready afghan afghan stitch AGULHAS AMIGURUMI Anchor text Ảnh đẹp Ảnh vui Animasi applique Art artikel Árvore de Natal em croche Aulia baby crochet Baby Dress baby knitting Baby learn bag Bags Bài viết BAKTUS Ballet Bun Cover balloons BARRADOS Bayi Bead Beads Bear Ear Hat BEBÊS belts Berita Berry Best WP Theme 2014 Better Blogger Seo Biologi Black blanket Blogal Template Blogger Codex Blogger Images Slider blogger navbar Blogger Rating blogger template 2014 Blogger Templates Blogger Tool Tip Blogger Tutorials Blogger Widgets Blogger-Template Blogspot Blogspot Templates Blue BLUSAS BOINA BOLEROS BOLSAS books BORBOLETAS Bounce Rates bows boxes bracelet Brown Browse Business Butterfly Button Counter Button Facebook CACHECOL CACHECOLAR cake candles candy Candy Cane Cards carving carving fruit carving fruits CASACO INFANTI CASACOS CASAQUINHO EM CROCHE CASAQUINHO EM TRICO CASAQUINHO PARA BEBÊ Cerpen CHAPEU clay COLAR COLAR DE FLORES COLETE coloring Competitor Research Contact Form for Blogger CORDÃO CORUJUINHAS crafts CROCHE COM SAQUINHOS PLASTICOS CROCHE IRLANDES Crochet Crochet Geek crochet pattern cross stitch Curtain customize cutting paper DECORAÇAO Design blogger template Dicionário de Trico - Inglês/Portugues Digg button Dijual Documentation Doily Domain dress dwell time earring ECHARPE Ecommerce Embroidery ENXOVAL PARA BEBÉ ESTOLAS Event Exit Rates facebook facebook button facebook like in blogger facebook share button facebook share button with counter FAIXA PARA CABELOS fashion Favicon for blogger feed rss Felt Fisika Flat News Templates FLORES Flower flower arrangement flowers crochet Folding paper FOLHAS food food decor Foto Free Blogger Templates Free Download Blogger Templates FREE FORM Free Premium frustration Funny Galaxy Stitch Gallery Games garden Gaya Hidup gel grips Geografi gift Gifts Girl glass Go Green GOLINHAS Google Google Analytics Google Merged All Accounts into One google plus button Google SERPs Google Webmaster Tools Google+ Google+ comment GORRO GRÁFICOS Granny Square Gray Green hair clip Haji Hama hats Heart Hexagon hide blogger navbar holiday craft holiday crafts home and garden Hook how to how to add favicon for blogger how to add feedburner How to install flat news how to turn off google plus comment how-to-guides Hunian Iklan Baris Ilmu Pertanian Image Thumbnail for Blogger imam Indexed Quickly for blogspot iNews 2014 Blogger Template Info Kontes Installing Blogger Template Internet Iseng Islam Itunes jewelery jewelry Karma Blogger Template Kata Bijak Kata Mutiara Kesehatan Kewarganegaraan Keyword Research Kiếm tiền kirigami Knit knitting knitting pattern knot Kuliner Landing Page Blogger Templates Lập trình Blogspot Latent Semantic Indexing LEAVES Like button facebook Lirik Lagu LirikNasyid Log Cabin Square LSI LUMINÁRIAS LUVAS LUVINHAS PARA BEBÊ Magazine Magazine Blogger Template make up making flower making flowers Making toys Manta MANTA PARA BEBÊ MANTA PARA SOFÁ Mashable MEUS MOMENTOS MEUS TRABALHOS mittens motif Motivasi Movie Multiples Music Nail art Nature necklace News News blogger template News Google News Pro Blogger Template Nivo image slider Olah Raga On page seo Online store Orange Organik Origami Pagerank painting PANTUFAS PAP Paper Patchwork PELERINE Penyakit Tanaman Peribahasa Personal Phần mềm pictures Pilihan Pillows Pink plastic POLAINA PONCHO Popcorn Popular Posts Popular Posts Code For Blogger Portfolio post automatically to twitter Premium Blogger Teamplates professional blogger templates Profil puff stitch Puisi pumpkin cap QUADRADO Quilling paper Quilt RECEITA RECEITA CULINÁRIA RECEITA DE PONTOS recycle recycling Red redirected to FeedBurner Related Post Widget remove navbar blogger RENDA DE PELO DE CABRA repair work Responsive Blogger Template retweet button ribbon rings rss for blogger rugs SACOLAS SAIAS DE CROCHE SANDÁLIAS EM CROCHÊ SAPATINHOS SAPATINHOS PARA BEBÊ Sastra Scarf scarves search engine optimization Search engine users seo Seo Blogger Template SEO Course Outline Seo For Blogger SEO Friendly Seo in 2014 Seo tips Seo Tutorial Seo Tutorial 2014 Seo With Blogger Serba Info Serba Tips serps sewing share button share twitter button shawls shoes and sandals Simple Singing sitemap blogspot sitemap page skirt Slider for blogspot snood Snowflake soap socks SQUARE steps to design a nice blogger template Strawberry subscrise button SUÉTER sweater Swiffer Sweeper Cover Syahira blogger theme TABELAS DE MEDIDAS DE TRICO E CROCHE tablecloths Tanaman Padi TAPETES. RECEITA Template TENIS PARA BEBÊ Thank you the panda update Thủ thuật Tien Nguyen tip tips Tips and Tricks TOALHAS TOUCAS TOUCAS PARA BEBÊ Travel TRICO Từ điển Blogspot TÚNICA tunisian turn off google plus comment Tutorial Tutorial Blog Tutorial video twitter button Twitter follow button twitter for blogspot underwear Valentine's day Vegeta Blogger Templates Video VÍDEO Video Blogger Templates video tutorial weaving Web 2.0 wedding Wedding Mag what is a bounce What Is Anchor Text what is bounce rate What is Seo White WIDGET Widget For Blogger wood Wordpress Look WordPress Themes XALE Yellow Youtube