Showing posts with label Pillows. Show all posts

Tuesday, September 27, 2011

Sewing patterns:Heart Felt Pillow tutorial

I had some felt that I needed to find a purpose for from my Studio 5 appearance. So I decided to make a pillow using the same technique with the folded circles. (Sorry about the bad picture, it is the best I could do…we need some sunshine around these parts).
It took about the same amount of time as the wreath. I did not need as many circles and instead of using a 3 inch circle, I used one that was 2.25 inches.

My pillow insert measured 12 x 16 inches. So I cut 2 peices of fabric for the pillow cover measuring 14 x 18 inches.
I then took one peice of fabric and drew a heart that would be the outline for shaping my heart. Then I simply sewed each circle onto the pillow. One. At. A. Time! I know what you are all thinking! That I am crazy. But it was really relaxing and it was a good excuse for me to sit down and watch movies. I don’t sit down and veg much so it was kind of nice. Plus…the weather here has been cold and dreary.
Then, when you finish, place the right sides of your fabric together and sew a 5/8 inch seam around the edge and leave an opening on one whole side. Turn inside out, insert pillow and then hand sew along the edge. (Or you can make the back into 2 overlapping peices so that the cover can be removed).
I really like how it has turned out. My kids, however, thought it was a waste of a pillow. Apparently the felt ruffles are not comfortable to lay on! Sweet music to my ears. The pillow might actually stay on the couch!!
Sewing patterns:Heart Felt Pillow tutorial

Friday, September 23, 2011

Crafts for home decor: MAKE A JERSEY KNIT SHAG PILLOW sewing tutorial

 Crafts for home decor: MAKE A JERSEY KNIT SHAG PILLOW sewing tutorial
 what you will need: 
*1 yard (to be safe in case of mess ups) of jersey fabric with the width of 60″ (jersey comes in a bolt length of anywhere from 42″ to 62″ or even wider…but the most common i’ve found is 58″ to 60″)   I ENDED UP GETTING 2 YARDS OF BLACK AND 1 YARD OF TURQUOISE SO I COULD MAKE MORE THAN ONE.
*2 squares of cotton fabric close in matching color to your jersey fabric cut to 11″ x 15″ (if you make a slightly larger pillow you will still be okay because you will have a little extra fabric)
cut from jersey fabric 19 strips at 1 1/2″ each.


*from each of the 19 strips cut 15: 4″ length rectangles. (you should be able to get 15, but if your fabric is wonky, and you get less than 15 it’s okay because remember you have extra fabric.)  I ended up cutting more strips  to make my pillow a bit fuller.
now take your two cotton rectangles cut to 11″ x 15″ on 1 of the right sides of your fabric, draw 3/4″ lines all the way across your rectangle. (you should get 19 lines)  I believe my lines were a little off on this too I think I only ended up with 18 but it is okay because the pillow still turned out darling! set the other piece of fabric aside as this will be the back of your pillow
next take one of your jersey rectangles, and measure at least 1/4″ down from the top of your pillow fabric, and start sewing a straight line using your drawn line on your fabric as your guide to place your jersey fabric strips.  as each strip is placed on the line scrunch it a bit while sewing it into place, continue adding strips one after another until you have a full line full of jersey.
Continue on until each row is full and it looks like a shag pillow.  Once done take your two cotton rectangles line them up and sew around all 4 sides. (inside out of course) leaving a small opening to fill the pillow with stuffing.   Once done turn the pillow so the right sides are facing out and stuff away!
Hand stitch your opening closed.  I know my tutorial isn’t that great but go visit Vanessa’s blog and you will see how detailed she is! I am in LOVE with my pillows     and they cost a total of $12.00 for 2 of them.

Monday, September 19, 2011

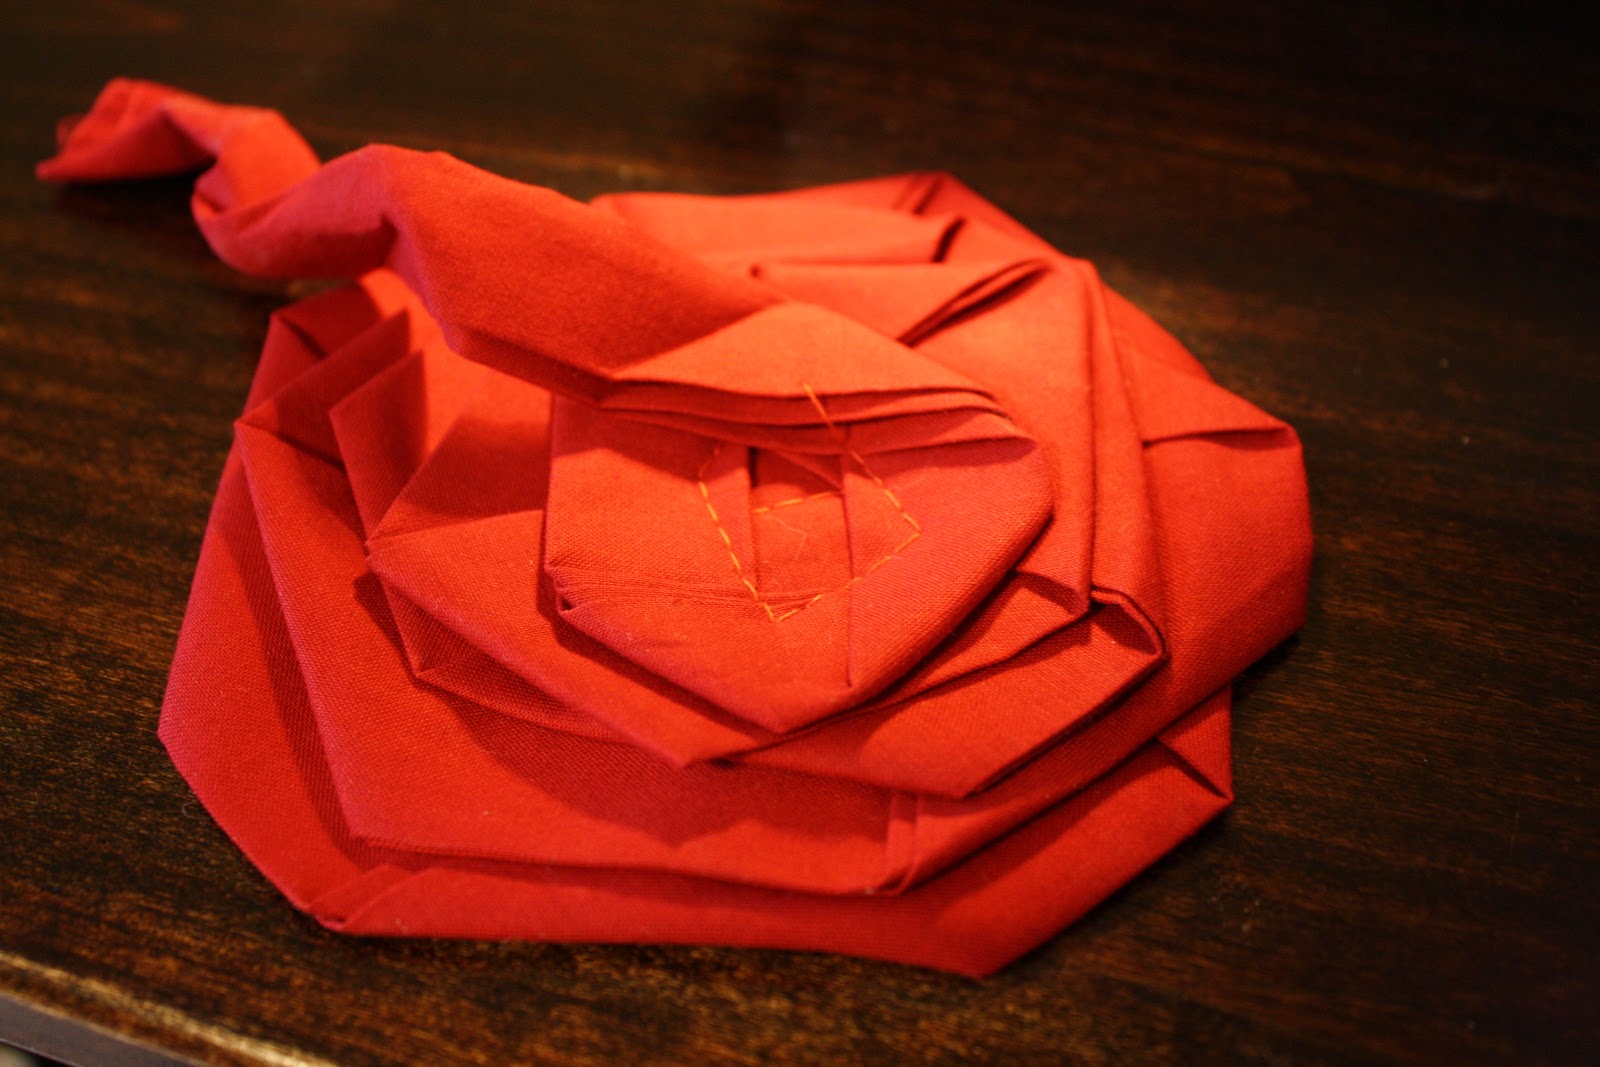
Unique crafts for home: rose pillows tutorial

Rosette Pillow


I just didn't have a spot in my house where the yellow would work.  That, and it's no longer available.  So, I attempted to make my own, and I really like how it turned out.  If you want to make one too, here's what you do!

Rosette Pillow


Here's what you'll need:

  • fabric for the body of the pillow (I used a grain sack found at a flea market for, wait for it... FREE!)

  • fabric for the rosettes (you'll need 1 1/2 yards)

  • piping (I bought mine premade, 2 1/2 yards)

  • pillow form (mine was 18x18)

  • scissors

  • tape measure

  • pins

  • sewing machine and thread

  • foot attachment for sewing on piping

  • Iron and ironing board

And let me forewarn you, I am self taught when it comes to sewing.  I don't know all the technical terms.  I just do what works for me :)
STEP ONE:  Cut fabric for the rosettes.  You will need 9 strips of fabric, 5 inches wide by whatever your fabric measures from selvedge to selvedge (usually 45 inches).
STEP TWO:  Fold in each long side toward the center about a 1/2 inch and press with iron


STEP THREE:  Fold in half long ways and press with iron.  Sort of like a big piece of bias tape.


Do this with all nine strips. 

You will not need to reopen the folds, but this is what the creases will look like if done properly


STEP FOUR: Create the rosettes.  Lay one strip of fabric down with the open side of the fold facing right.  Bring the rest of the strip up and over to the right so that it forms a 90 degree angle in the center and press with iron.


   Bring the rest of the fabric up to form another 90 degree angle in the center and press with iron.


Now bring the rest of the fabric down and over to the left to complete the base of the rosette and again press with iron.  This part will determine the width of the rosette (mine was 5 inches wide).


Keep repeating the same process bringing the fabric in closer to the center each time.  Keep pressing with your iron to keep everything somewhat in place.


When you get to where you have about 10 inches of fabric left in length, fold long ways and press.


Now repeat the same process of folding the fabric in towards the center.


Stop when you have about 5 inches of fabric left in length.


Now instead of folding the fabric, start rolling it in towards the center and tuck the last bit of fabric behind the center of the rosette.  Give it a really good press with the iron.  Pressing with the iron will help you know where each of your folds are when you take it to your sewing machine.  Much less frustration that way :) 


Now you've just got to do that 8 more times! 
STEP FIVE: Sew the rosette's layers together.  Unfold the rosette (this is where pressing the folds comes in handy) and begin sewing at the first fold.

 
Once you get over the fold stop with the needle down in the fabric, release the pressure on your foot, and rotate the rosette clockwise.  Place the pressure foot back down and start sewing again until you cross over the next fold.  Keep repeating this process until you get to where you started rolling the fabric (the center of the rosette).


Refold/roll the center of the rosette back into place and stitch down using a needle and thread.


WAHOO!!!  You're done with the rosettes!


Whew!  Still with me?

STEP SIX: Cut your fabric for the pillow.  I used my awesome FREE grain sack.  My pillow form was 18x18 so I cut my piece for the front of the pillow 19x19 (allowing for a 1/2 inch seam allowance on each side).  I did an envelope closure for the back so I cut two pieces at 19x12 each.  The top of my grain sack was finished so I cut my back pieces keeping this in mind.  This might make more sense later on.


STEP SEVEN: Pin your piping into place on the front piece of fabric.  When you get to the corners, cut a series of slits into the piping to allow it to curve nicely. 


STEP EIGHT: Bust out your sewing foot for piping and sew down your piping all the way around, overlapping the beginning and end of the piping. 
STEP NINE:   Place your rosettes onto the front piece of the pillow and pin in place.


 STEP TEN: You can either tack them into place by hand, or use your sewing machine.  I used my machine and just stitched around the inside of the base "petals".


 View from the back after rosettes are sew on
 

STEP ELEVEN:  Pin the back two pieces to the front of the pillow, right sides facing each other.  The finished edges of the two back pieces should be towards the center of the pillow, one piece laying about 5 inches over the other at the center point.  Of course, out of all the bazillion pictures I took for this project, I don't have one of this!  But, this is what the back looks like when finished.


STEP TWELVE: Using your piping foot, sew the back pieces in place.  The easiest way I've found to do this without messing up the piping is to turn the pillow around so that the backside of the front of the pillow is facing up (like the picture in Step 10).  That way you can stitch directly over your previous stitches, using them as a guide.  Stitch all the way around the pillow.  You don't need to leave an opening since you're doing an envelope back.


STEP THIRTEEN: Trim any excess fabric and turn the pillow inside out.

STEP FOURTEEN: Insert pillow form.

STEP FIFTEEN: Admire your work and pat yourself on the back!


Thursday, August 25, 2011

Crafts for home: crocheted pillows and rugs

Crafts for home: crocheted pillows and rugs
Free crochet patterns
2. 
3. 
4. 
5. 
6. 
7. 
8. 
9. 
10. 
11. 
12. 
13. 
14. 
15. 
16. 
17. 
18. 
19. 
20. 
21. 
22. 
23. 
24. 
25. 
26. 
27. 
28.

Labels

1 column 2 column 3 column 4 column aaSolah Accessories add button subscrise for blogger Add Digg Button to Blogger add feedburner for blogger add like button facebook to blogger Add Pinterest Pin it Button to Blogger add sitemap blogger to google add stumbleUpon badge to blogger Ads Ready afghan afghan stitch AGULHAS AMIGURUMI Anchor text Ảnh đẹp Ảnh vui Animasi applique Art artikel Árvore de Natal em croche Aulia baby crochet Baby Dress baby knitting Baby learn bag Bags Bài viết BAKTUS Ballet Bun Cover balloons BARRADOS Bayi Bead Beads Bear Ear Hat BEBÊS belts Berita Berry Best WP Theme 2014 Better Blogger Seo Biologi Black blanket Blogal Template Blogger Codex Blogger Images Slider blogger navbar Blogger Rating blogger template 2014 Blogger Templates Blogger Tool Tip Blogger Tutorials Blogger Widgets Blogger-Template Blogspot Blogspot Templates Blue BLUSAS BOINA BOLEROS BOLSAS books BORBOLETAS Bounce Rates bows boxes bracelet Brown Browse Business Butterfly Button Counter Button Facebook CACHECOL CACHECOLAR cake candles candy Candy Cane Cards carving carving fruit carving fruits CASACO INFANTI CASACOS CASAQUINHO EM CROCHE CASAQUINHO EM TRICO CASAQUINHO PARA BEBÊ Cerpen CHAPEU clay COLAR COLAR DE FLORES COLETE coloring Competitor Research Contact Form for Blogger CORDÃO CORUJUINHAS crafts CROCHE COM SAQUINHOS PLASTICOS CROCHE IRLANDES Crochet Crochet Geek crochet pattern cross stitch Curtain customize cutting paper DECORAÇAO Design blogger template Dicionário de Trico - Inglês/Portugues Digg button Dijual Documentation Doily Domain dress dwell time earring ECHARPE Ecommerce Embroidery ENXOVAL PARA BEBÉ ESTOLAS Event Exit Rates facebook facebook button facebook like in blogger facebook share button facebook share button with counter FAIXA PARA CABELOS fashion Favicon for blogger feed rss Felt Fisika Flat News Templates FLORES Flower flower arrangement flowers crochet Folding paper FOLHAS food food decor Foto Free Blogger Templates Free Download Blogger Templates FREE FORM Free Premium frustration Funny Galaxy Stitch Gallery Games garden Gaya Hidup gel grips Geografi gift Gifts Girl glass Go Green GOLINHAS Google Google Analytics Google Merged All Accounts into One google plus button Google SERPs Google Webmaster Tools Google+ Google+ comment GORRO GRÁFICOS Granny Square Gray Green hair clip Haji Hama hats Heart Hexagon hide blogger navbar holiday craft holiday crafts home and garden Hook how to how to add favicon for blogger how to add feedburner How to install flat news how to turn off google plus comment how-to-guides Hunian Iklan Baris Ilmu Pertanian Image Thumbnail for Blogger imam Indexed Quickly for blogspot iNews 2014 Blogger Template Info Kontes Installing Blogger Template Internet Iseng Islam Itunes jewelery jewelry Karma Blogger Template Kata Bijak Kata Mutiara Kesehatan Kewarganegaraan Keyword Research Kiếm tiền kirigami Knit knitting knitting pattern knot Kuliner Landing Page Blogger Templates Lập trình Blogspot Latent Semantic Indexing LEAVES Like button facebook Lirik Lagu LirikNasyid Log Cabin Square LSI LUMINÁRIAS LUVAS LUVINHAS PARA BEBÊ Magazine Magazine Blogger Template make up making flower making flowers Making toys Manta MANTA PARA BEBÊ MANTA PARA SOFÁ Mashable MEUS MOMENTOS MEUS TRABALHOS mittens motif Motivasi Movie Multiples Music Nail art Nature necklace News News blogger template News Google News Pro Blogger Template Nivo image slider Olah Raga On page seo Online store Orange Organik Origami Pagerank painting PANTUFAS PAP Paper Patchwork PELERINE Penyakit Tanaman Peribahasa Personal Phần mềm pictures Pilihan Pillows Pink plastic POLAINA PONCHO Popcorn Popular Posts Popular Posts Code For Blogger Portfolio post automatically to twitter Premium Blogger Teamplates professional blogger templates Profil puff stitch Puisi pumpkin cap QUADRADO Quilling paper Quilt RECEITA RECEITA CULINÁRIA RECEITA DE PONTOS recycle recycling Red redirected to FeedBurner Related Post Widget remove navbar blogger RENDA DE PELO DE CABRA repair work Responsive Blogger Template retweet button ribbon rings rss for blogger rugs SACOLAS SAIAS DE CROCHE SANDÁLIAS EM CROCHÊ SAPATINHOS SAPATINHOS PARA BEBÊ Sastra Scarf scarves search engine optimization Search engine users seo Seo Blogger Template SEO Course Outline Seo For Blogger SEO Friendly Seo in 2014 Seo tips Seo Tutorial Seo Tutorial 2014 Seo With Blogger Serba Info Serba Tips serps sewing share button share twitter button shawls shoes and sandals Simple Singing sitemap blogspot sitemap page skirt Slider for blogspot snood Snowflake soap socks SQUARE steps to design a nice blogger template Strawberry subscrise button SUÉTER sweater Swiffer Sweeper Cover Syahira blogger theme TABELAS DE MEDIDAS DE TRICO E CROCHE tablecloths Tanaman Padi TAPETES. RECEITA Template TENIS PARA BEBÊ Thank you the panda update Thủ thuật Tien Nguyen tip tips Tips and Tricks TOALHAS TOUCAS TOUCAS PARA BEBÊ Travel TRICO Từ điển Blogspot TÚNICA tunisian turn off google plus comment Tutorial Tutorial Blog Tutorial video twitter button Twitter follow button twitter for blogspot underwear Valentine's day Vegeta Blogger Templates Video VÍDEO Video Blogger Templates video tutorial weaving Web 2.0 wedding Wedding Mag what is a bounce What Is Anchor Text what is bounce rate What is Seo White WIDGET Widget For Blogger wood Wordpress Look WordPress Themes XALE Yellow Youtube